
How to Make Sea Glass Christmas Tree Framed Art — A Fun and Easy Holiday Craft
Updated on December 6, 2025

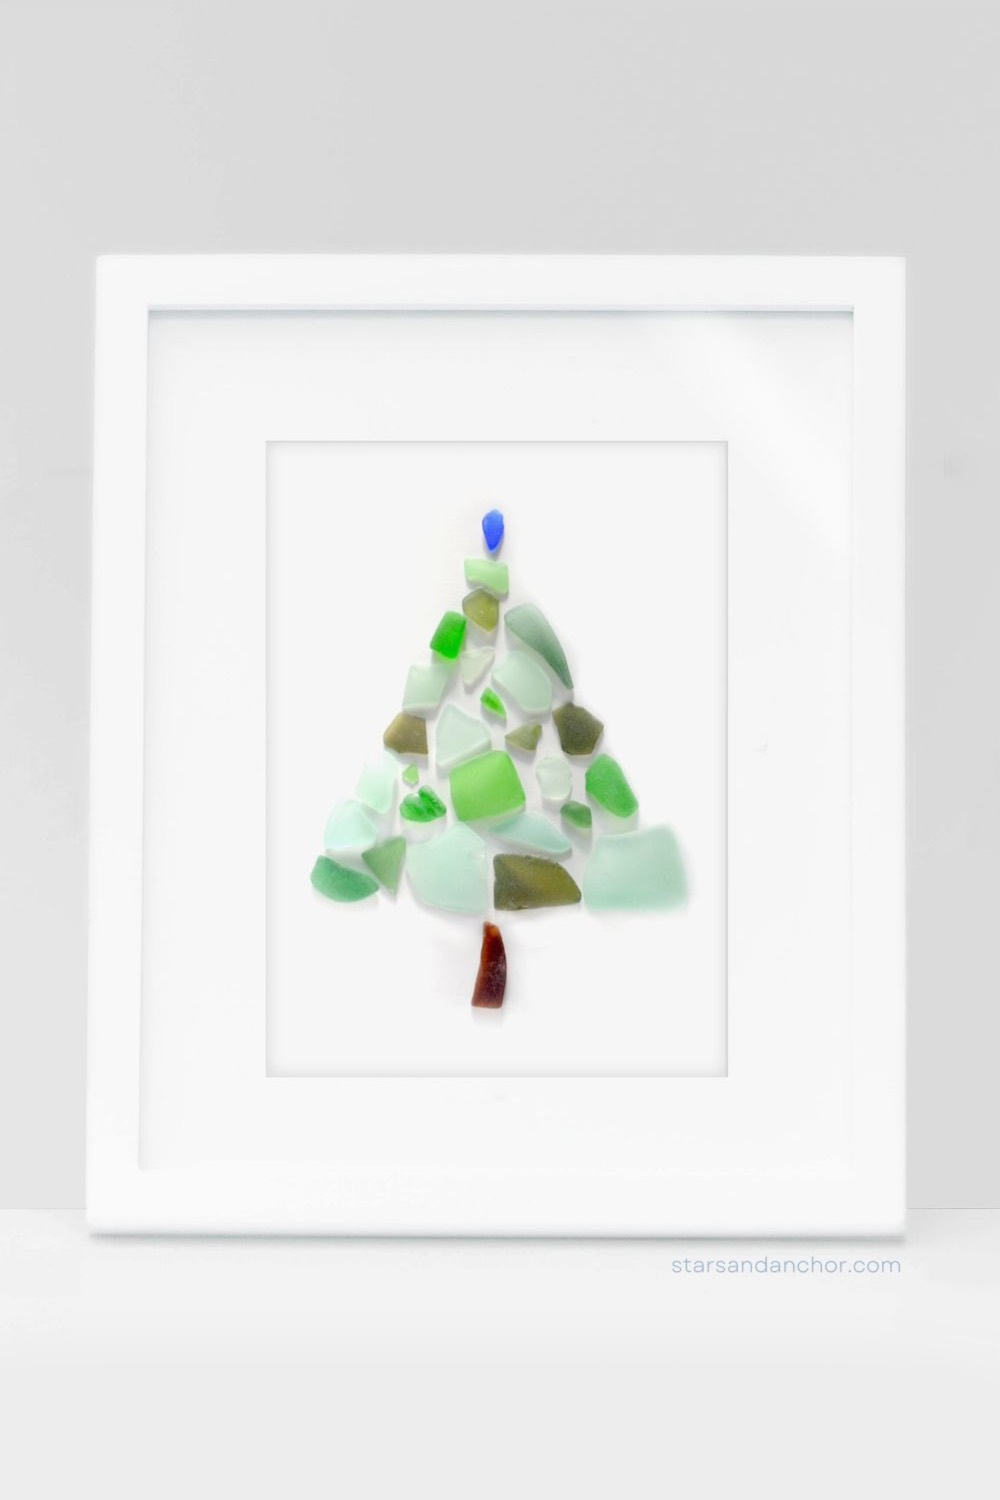
Step-by-step instructions for making a DIY sea glass Christmas tree.
This post may include affiliate links, meaning I may earn a commission if you make a purchase through them, at no additional cost to you. Thank you for supporting my efforts in creating these posts! As an Amazon Associate I earn from qualifying purchases.
For a beachy DIY Christmas craft, this sea glass Christmas tree was fun and easy to make. If you have a bunch of sea glass that you’ve collected at the beach, this can be a great way to use it, and you’ll then have art that you can enjoy decorating your home with every holiday season. Otherwise, you can order some real sea glass or man-made “sea glass” online to use for craft projects and decor. I’ve been collecting sea glass at the beach practically since I could walk, so I always have plenty lying around.
Sea glass, also sometimes called beach glass, is pieces of glass that have been discarded in an ocean, bay, or lake and gets broken and tumbled to the point of having a frosted appearance. The tumbling process by the waves against sand and rocks creates round, smooth edges so that no sharp edges remain. It’s said that well-frosted and well-rounded sea glass can take 20–50 years to form, or more!
For this sea glass Christmas tree craft I selected green and blue-green pieces for the tree, brown for the tree trunk, and cobalt blue for the top, although if I’d been able to find a piece of red, I would’ve used that on top. As an option, if you have many small pieces of red or other colors, you could add them into your design as “ornaments” to look like it’s a decorated sea glass Christmas tree.
Here’s everything you need to know to create your own sea glass Christmas tree framed art!
Supplies Needed
- Sea glass — collected yourself at the beach, or purchased from a craft store or online
- Card stock paper
- Glue — I used E6000 adhesive. Other kinds of glue may work, too.
- Picture frame — must be deep enough for the sea glass you’re using — or shadow box
Tip: I prefer simple frames with clean lines that come with a mat, like the frame in my photo, which lets the artwork shine. An ornate frame can distract from your artwork.
How to Make Sea Glass Christmas Tree Framed Art in 6 Easy Steps
Follow these 6 easy steps to create your own DIY sea glass Christmas tree artwork.
Step 1: Gather your supplies
Gather all of the supplies needed for this project from the list above.
Step 2: Prepare your background
If your artwork is small enough, thick card stock paper should be able to hold the sea glass on its own, especially if you use a frame or shadow box with a mat, which will help to secure the card stock in the frame. In this case, you just need to lay out the card stock on your work surface and move on to the next step.
For larger artwork, or if your sea glass pieces are especially heavy or thick, you may need to secure the card stock to the backing of your frame with glue (any regular craft glue should do the trick) before adding your sea glass to it.
Step 3: Arrange your sea glass into a Christmas tree shape on the card stock
I started by using larger/heavier pieces of sea glass on the bottom of the tree, then arranged pieces into a Christmas tree outlined shape, then filled in the middle. Finding the right shapes to fill the spaces is a little bit like doing a puzzle.
Step 4: Glue your pieces down
Carefully lift up each piece of sea glass one at a time, put a small dab of glue on the back, and set it back down in the same place.
Step 5: Let your sea glass Christmas tree artwork dry
I always give it 24 hours to dry, to be safe. You don’t want it falling apart if you move it too soon.
Step 6: Place your sea glass Christmas tree artwork into your frame
Carefully place your artwork into the frame and secure the backing. Then display it in your home wherever you’d like, or wrap it if you’re giving it as a gift!
Related: Coastal Christmas Decorations Meet Classic Christmas Style: Holiday Finds You’ll Love
Where to Display Your DIY Sea Glass Christmas Tree Art
Here are some ideas for where to display your framed artwork in your coastal home or beach house:
- On a console table
- On a bookshelf
- On a dresser
- On a nightstand in your guest room
- On a desk in your home office
- Hang it on your wall. I think it would look super cute hanging in a powder room, home office, or above a bar cart!
As you can see, making a sea glass Christmas tree is a quick and relatively easy Christmas craft project. I made this craft as an adult, but it would also be fun for kids; they just might need help with the gluing part, especially if you use a heavy-duty glue like the kind I used.
Once you make sea glass Christmas tree art, you can enjoy it year after year during the holiday season to add some beachy charm to your home in December. I keep mine with my other holiday decorations and enjoy displaying it on my console table with other holiday decor.
I hope you enjoy making this DIY sea glass craft, and that it brings you joy for years to come! If you enjoy the beach and the holidays as much as I do, it’s a perfect pairing. This framed artwork would also make for a great DIY handmade gift for someone you know who loves the beach!
Related: These Are the Perfect Beach Color Palettes, and Here’s How You Can Use Them
Save This Sea Glass Christmas Tree Craft for Later
Pin this graphic on Pinterest, or bookmark this page, so you can refer back to these instructions for how to make framed sea glass Christmas tree art. And don’t forget to follow Stars & Anchor on Pinterest and on Instagram for more coastal lifestyle and beach inspiration.

How to Make a Sea Glass Christmas Tree
Have you ever made framed sea glass art before? What other crafts have you made using sea glass? I’d love to hear about it in the comments.


